






How to Fix Flickering Lights: Troubleshooting and Safety Guide
To fix a flickering lights, first determine whether the problem affects one bulb, one fixture, one circuit, or the whole home.
A single flickering bulb can often be resolved by switching off the light, allowing the bulb to cool, tightening it carefully, or replacing it with a compatible bulb. Flickering across several rooms, especially when accompanied by buzzing, burning smells, warm switches, sparks, or repeated breaker trips, can indicate a wiring or electrical-service problem that requires a licensed electrician or utility company. ESFI identifies unexplained flickering or dimming as a possible electrical hazard rather than merely a lighting inconvenience. (ESFI)
Do not remove switches, open electrical panels, touch service wires, or attempt internal wiring repairs unless you are properly trained and legally authorized to perform that work.
Flickering Lights at a Glance
| What is flickering? | Likely starting point | Recommended action |
|---|---|---|
| One replaceable bulb | Loose, failing, or incompatible bulb | Turn off, cool, reseat, or replace it |
| One LED fixture on a dimmer | LED and dimmer incompatibility | Check that both products support each other |
| One plug-in lamp | Bulb, lamp socket, cord, or outlet | Test a compatible bulb and another known-good outlet |
| Several lights on one circuit | Heavy load, switch, fixture, or branch-circuit problem | Reduce temporary load and contact an electrician if it continues |
| Lights dim when an appliance starts | Voltage drop or heavily loaded circuit | Record the appliance involved and arrange inspection if severe or repeated |
| Several rooms or the whole house | Utility voltage, service connection, panel, or wiring issue | Contact the utility and a licensed electrician |
| Flicker with heat, smell, buzzing, or sparks | Potential overheating or arcing | Stop using the affected circuit and seek urgent professional help |
This sequence prevents a common mistake: replacing several bulbs when the real fault is in the dimmer, circuit, electrical service, or wiring.
Stop Troubleshooting and Get Help Immediately When
Turn off the affected light or appliance from a safe location and contact a qualified electrician when flickering appears with:
- A burning or overheated-plastic smell
- Buzzing, sizzling, cracking, or popping
- Sparks or visible arcing
- Warm or discolored switches or outlet covers
- A switch that shocks or tingles
- Repeatedly tripping breakers
- Smoke
- Damaged wiring
- Partial loss of power
- Lights that suddenly become much brighter or dimmer
- Flickering that increases when wind moves overhead service wires
ESFI lists flickering lights, frequent breaker trips, buzzing, overheating, discoloration, odors, sparks, and shocks among the signs of unsafe home wiring. CPSC also warns that flickering combined with hot faceplates or a burning-plastic smell can indicate dangerous electrical connections, particularly in homes with older aluminum branch-circuit wiring. (ESFI)
Call emergency services when there is active smoke, fire, a downed power line, or an immediate risk to people. Never approach fallen electrical lines or objects touching them. (PG&E)
Step 1: Find Out How Much of the Home Is Affected
Before changing anything, observe the pattern.
Check whether the flickering affects:
- One bulb
- Every bulb in one fixture
- Several fixtures in one room
- One side or level of the home
- Most or all lights in the property
- Neighboring homes
Also note:
- Whether it happens at a particular dimmer setting
- Whether an air conditioner, refrigerator, microwave, vacuum, heater, or other appliance has just started
- Whether the weather is windy or stormy
- Whether the issue began after electrical work, remodeling, or installation of a new appliance
- Whether the light flickers continuously or only during startup
- Whether a breaker has tripped
A simple log can help an electrician or utility identify a pattern. PG&E recommends recording the timing of power problems and which equipment was running when flickering or other disturbances occurred. (PG&E)
Step 2: Check a Single Flickering Bulb
When only one replaceable bulb flickers, begin with the bulb rather than the home’s wiring.
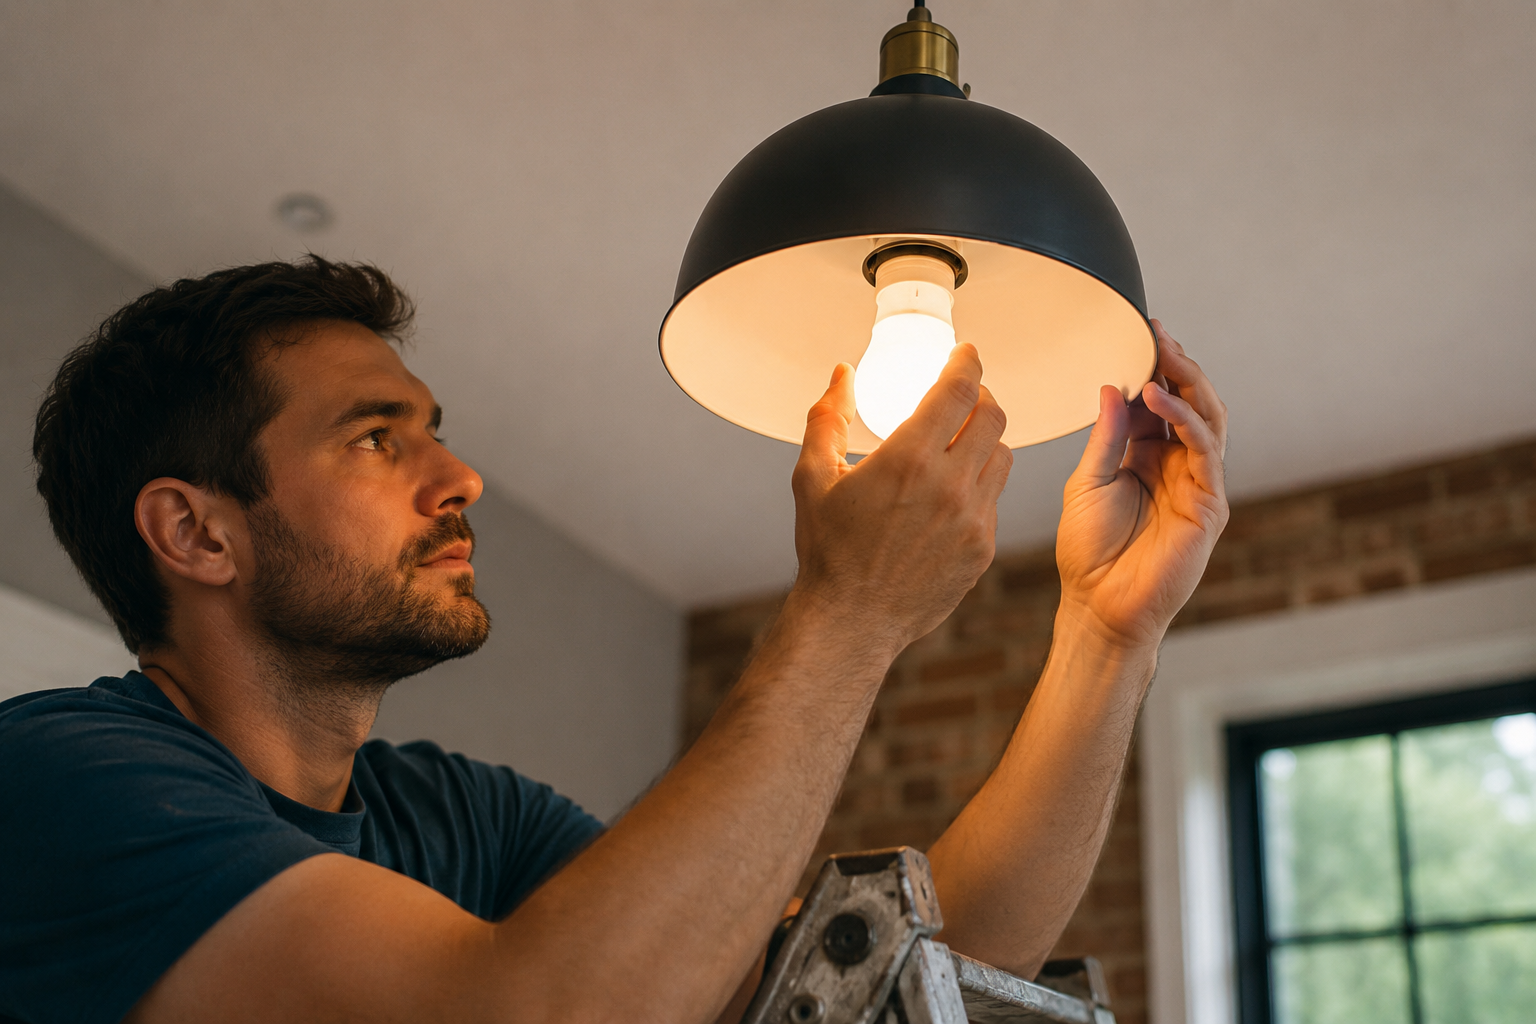
Turn off the light and let it cool
Switch the light off before touching the bulb. Some lamps become hot enough to cause burns.
Do not work from an unstable chair or improvised platform. Use a stable ladder only when the bulb can be reached without leaning or working near exposed electrical components.
Reseat the bulb
Once it is cool, tighten a screw-base bulb gently until it is secure. Do not force it, overtighten it, or continue if the socket appears burned, cracked, loose, or corroded.
For pin-base, twist-lock, or specialty lamps, follow the fixture manufacturer’s installation instructions rather than twisting or pushing at random.
Replace it with a known-good bulb
Install a bulb with:
- The correct base
- The correct shape for the fixture
- A wattage that does not exceed the fixture’s rating
- Approval for enclosed fixtures when the fixture is enclosed
- Dimming capability when it is connected to a dimmer
Using a bulb above the fixture’s maximum wattage can overheat the fixture or surrounding material. ESFI recommends matching the bulb to the fixture’s stated wattage and using bulbs specifically labeled for enclosed fixtures where required. (ESFI)
If the replacement works normally, the original bulb was likely failing or incompatible. When the replacement also flickers, the problem may be in the socket, switch, dimmer, fixture driver, wiring, or power supply.
Step 3: Check LED and Dimmer Compatibility
LED flicker frequently appears after an older incandescent bulb is replaced with an LED.
The new bulb may illuminate normally at full brightness but flicker, flash, buzz, turn off, or behave unpredictably at lower dimmer settings.
Confirm that the bulb is dimmable
A nondimmable LED should not be expected to work correctly on a dimming circuit. Check the bulb package, model number, or manufacturer’s product page for a clear dimmable label.
Check that the dimmer supports LED loads
Older dimmers were often designed around the higher electrical load and behavior of incandescent bulbs. LED drivers interact differently with dimming equipment, so a bulb and dimmer can both work individually while performing poorly together.
The US Department of Energy explains that LED dimming performance depends on the lamp driver and its compatibility with the dimmer. Poor compatibility can introduce or increase flicker. (Energy Efficiency and Renewable Energy)
Use the manufacturers’ compatibility tools
Find the model number of both the bulb and dimmer. Check whether that exact combination appears in the dimmer manufacturer’s compatibility database.
Leviton and Lutron both provide tools for checking tested LED and dimmer combinations. Leviton also recommends confirming that the LED is labeled dimmable and that the dimmer is rated for LED lighting. (Leviton)
Test a higher dimmer level
When flickering occurs only near the lowest brightness setting, temporarily increase the dimmer level.
Some LED dimmers include a low-end adjustment that changes the minimum brightness. Follow the dimmer’s official instructions rather than removing the wall plate or adjusting internal wiring without proper training. (Leviton)
A bulb that works only above a certain level may still be incompatible with the dimmer. Raising the brightness is a diagnostic step, not proof that the installation is correct.
Step 4: Check a Plug-In Lamp
If a table or floor lamp flickers:
- Turn it off and unplug it.
- Inspect the cord and plug without opening the lamp.
- Stop using it if the cord is cracked, frayed, crushed, melted, or repaired with tape.
- Install a known-good compatible bulb.
- Plug the lamp directly into another known-working wall outlet.
- Avoid testing through a damaged extension cord or overloaded power strip.
If the lamp works normally in another outlet, the original outlet or circuit may need inspection. If it flickers everywhere with more than one compatible bulb, the lamp’s socket, switch, cord, or internal connection may be failing.
Extension cords should be temporary, should not replace permanent wiring, and should not be overloaded or routed through walls, floors, ceilings, or doorways. (ESFI)
Step 5: Notice Whether an Appliance Triggers the Flicker
Large appliances and motor-driven equipment can briefly affect voltage when starting.
Record whether the flicker happens when any of these turn on:
- Air conditioner
- Heat pump
- Refrigerator
- Freezer
- Vacuum cleaner
- Microwave
- Washing machine
- Sump or well pump
- Power tool
- Space heater
A very brief, slight dimming event may be linked to appliance startup. Repeated, severe, prolonged, or worsening flicker needs investigation because it can involve an overloaded circuit, voltage sag, poor connection, undersized wiring, appliance fault, or service-quality issue.
ESFI lists lights that flicker or dim when appliances operate as a warning sign that should be evaluated, especially when accompanied by breaker trips, heat, noise, odors, or shocks. (ESFI)
Do not solve the problem by running a high-power appliance through an extension cord or multi-outlet adapter. Major appliances should normally connect directly to appropriate receptacle outlets. (ESFI)
Step 6: Check Whether the Problem Is Limited to One Circuit
When several lights in one area flicker together, the issue is unlikely to be several bulbs failing at exactly the same time.
Possible causes include:
- A failing switch
- A loose fixture connection
- An overloaded circuit
- A damaged conductor
- An aging breaker
- Poorly installed lighting
- A shared neutral or branch-circuit problem
- Several incompatible LED products on one dimmer
Homeowners can safely note which lights and outlets are affected, but internal circuit testing should be performed by a qualified electrician.
Do not repeatedly reset a breaker that continues to trip. Frequent tripping is a warning sign, not a normal operating condition. (ESFI)
Step 7: Contact the Utility for Whole-House Flickering
Contact your electric utility when:
- Lights flicker throughout the home
- Part of the home loses power
- Several appliances behave abnormally
- Neighbors report the same problem
- Flickering follows storms or high winds
- The problem appears related to overhead service wires
- The home has high or low voltage symptoms
- Flickering continues after an electrician finds no customer-side fault
Utilities commonly classify flickering lights and partial power as voltage or service-quality problems. PG&E, for example, accepts voltage investigations for high voltage, low voltage, partial power, and flickering lights, then determines whether the problem is on the utility or customer side. (PG&E)
Do not touch the meter, service drop, weatherhead, service-entrance cable, or utility equipment. CPSC warns that bad contacts at the connection between the service drop and entrance cable can cause flickering, particularly during wind, and advises contacting the power company rather than attempting a repair. (U.S. Consumer Product Safety Commission)
Why LED Lights Flicker Even Without a Dimmer
An LED bulb contains electronic components that convert incoming power into the form required by the LEDs. Flicker can result when that power supply or driver does not deliver stable output.
Possible causes include:
- Low-quality or failing bulb electronics
- Loose socket contact
- Voltage fluctuations
- Fixture heat
- Incompatible smart switches
- Electronic timers or occupancy sensors
- Transformers used with low-voltage lighting
- Loose wiring
- Poorly matched drivers and controls
ENERGY STAR explains that LED products rely on electronic components and heat management rather than a simple incandescent filament. A failed driver or heat-related component can therefore cause blinking or intermittent operation even when the visible LED elements remain intact. (ENERGY STAR)
For integrated LED fixtures without a replaceable bulb, the driver or entire fixture may require replacement. Use the manufacturer’s troubleshooting and warranty process before purchasing random replacement components.
Smart Bulbs and Smart Switches
A smart bulb can flicker when it is:
- Connected to a wall dimmer that is not intended for smart bulbs
- Receiving reduced rather than full power
- Losing communication with its hub or app
- Running outdated firmware
- Installed in an incompatible fixture
- Experiencing a hardware failure
Many smart bulbs are designed to receive constant full power and handle dimming through their app. Using an ordinary wall dimmer can create unstable operation unless both products specifically support that setup.
Check the bulb and switch manufacturer’s documentation. Do not assume that a product labeled “smart” works with every dimmer, occupancy sensor, timer, or home-automation control.
Fluorescent Lights That Flicker
A brief flicker during startup can occur with some fluorescent lamps, especially older fixtures or in low temperatures. Persistent flickering can result from:
- An aging tube
- Poor contact at the lamp holders
- A failing ballast
- Incorrect lamp type
- Low temperature
- A fixture problem
Turn the fixture off before replacing the tube. Confirm the exact lamp designation printed on the old tube or fixture label.
Ballast replacement involves internal electrical connections and should be performed by someone qualified to work on the fixture. Older fluorescent equipment may also contain components that require specific disposal procedures.
Can Flickering Lights Cause Headaches?
Visible and non-obvious light-output fluctuations can affect comfort differently from person to person. The Department of Energy uses “flicker” as a broad term for changes in light output over time, and some LED lighting systems can produce variation even when it is not immediately obvious to every viewer. (The Department of Energy’s Energy.gov)
Replacing an obviously unstable bulb or incompatible dimmer may improve the environment, but recurring headaches, visual symptoms, dizziness, seizures, or other health concerns need appropriate medical advice rather than electrical troubleshooting alone.
Flickering Outdoor and Permanent Lights
For outdoor fixtures, first check whether the problem affects only one replaceable lamp, the entire lighting run, or other indoor circuits as well.
Moisture, damaged cables, failed transformers, loose low-voltage connectors, controllers, and incompatible replacement components can all cause outdoor systems to flicker.
Do not open wet equipment or climb onto a roof to inspect permanent lighting while the system is energized. Contact the installer when the equipment is hardwired, mounted above safe reach, under warranty, or integrated into a proprietary controller.
Readers comparing these systems can review Headlinza’s guide to permanent holiday lighting systems, including installation and electrical-quality considerations.
Common Mistakes to Avoid
Do not:
- Ignore flickering accompanied by heat or odors
- Keep tightening a bulb after it is secure
- Install a bulb above the fixture’s maximum wattage
- Use a nondimmable LED on a dimmer
- Assume every LED works with every dimmer
- Open a switch or fixture without electrical training
- Touch utility service equipment
- Keep resetting a repeatedly tripping breaker
- Use extension cords as permanent wiring
- Replace several bulbs before checking whether the whole circuit flickers
- Assume that a new bulb means the wiring must be safe
- Climb onto a roof to inspect energized outdoor lighting
The safe DIY boundary ends at replacing an accessible bulb, testing a plug-in lamp, reviewing product compatibility, and documenting the pattern.
Frequently Asked Questions
Why does my light flicker even after replacing the bulb?
The socket, fixture, dimmer, switch, LED driver, circuit wiring, or incoming power may be causing the problem. If a known-good compatible bulb also flickers, stop treating it as a bulb-only issue.
Why do my LED lights flicker on a dimmer?
The LED may be nondimmable, the dimmer may be designed for incandescent loads, or the specific bulb and dimmer may not be compatible. Use the manufacturers’ compatibility tools and check the dimmer’s minimum-level adjustment. (Leviton)
Is it normal for lights to dim when the air conditioner starts?
A small momentary change can occur when a motor starts, but severe, prolonged, repeated, or worsening flicker should be inspected. Record which appliance triggers it and whether breakers, outlets, or switches show other warning signs.
Why are lights flickering throughout my house?
Whole-house flickering can involve utility voltage, service connections, the electrical panel, or customer-side wiring. Contact the utility to check its service and arrange a licensed electrical inspection. (PG&E)
Can a loose bulb cause flickering?
Yes. Poor contact between the bulb and socket can interrupt power. Turn the light off, allow the bulb to cool, and reseat it gently. Stop if the socket is loose, burned, or damaged.
Are flickering lights a fire hazard?
They can be. Flickering associated with loose wiring, arcing, overheating, aluminum-wire connection failures, or overloaded circuits can indicate a fire risk. Burning smells, heat, sparks, buzzing, and repeated breaker trips require prompt professional attention. (U.S. Consumer Product Safety Commission)
Final Takeaway
Begin with the scope of the problem.
For one accessible bulb, switch the light off, allow it to cool, reseat it gently, and test a known-good compatible replacement. For an LED on a dimmer, confirm that the bulb is dimmable and that the exact bulb and dimmer combination has been tested.
When several lights flicker together, an appliance repeatedly triggers the issue, or the entire home is affected, move beyond bulb replacement. Record the pattern, contact a licensed electrician, and report possible voltage or service problems to the utility.
Stop using the affected circuit immediately when flickering appears with burning odors, heat, discoloration, buzzing, sparks, shocks, smoke, partial power, or repeated breaker trips.